


Configuring Outlook 2016
To set up Microsoft Outlook 2016 to check your Nexus365 email account, follow these steps:
- open Outlook 2016.: you will be presented with the Welcome screen
- click Next to continue to the Account setup Wizard
- select Yes to set up an email account and click Next
- enter your name, your full email address (eg larry.parker@ouit.ox.ac.uk) and your password (created at account activation)
- click Next and wait for Outlook to be configured - this can take a few minutes
- at the Windows Security screen for Microsoft Outlook, enter your Single Sign On (SSO) username plus @OX.AC.UK (note the capitalisation) in the format abcd1234@OX.AC.UK and then your password (created at account activation) to allow Outlook to complete the setup process.
- click Finish to complete.
Configuring Outlook for Mac 2016
- start Outlook for Mac 2016 using the Outlook 2016 Icon
- you will see the Set Up Your Email splash screen.
- enter your Single Sign On (SSO) username plus @OX.AC.UK (note the capitalisation) in the format abcd1234@OX.AC.UK
- you may get the Choose Provider option, if so, select Office 365
- you will (briefly) see a splash screen connecting to Office 365
- after a few seconds the University Webauth authentication screen will appear. Enter your SSO (lower case, no need for @OX.AC.UK here), your password, then click on the Login button to continue
- if you are not already logged into the University's Webauth service then your University of Oxford SSO is confirmed by this screen: click the green Continue to Shibboleth Identity Provider button
- finally you will see the Success screen
- click Done to begin using Outlook 2016 with your account: you can now access Outlook mail with your client
Configuring Mac Mail
To set up Mac Mail to check your Office 365 email account follow these steps:
1. open Mac Mail as normal and from the Mail menu choose Accounts.
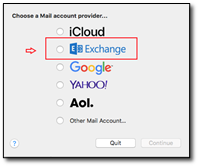
2. choose Exchange from the list. If you have an existing email account already configured, click the Plus button under the list of accounts to add your office 365 account.
3. Enter your name (first name and last name) and then department email address and then your SSO password (created at account activation, the one tied to your email account).
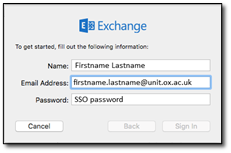
4. Click Sign In and wait while loading
Note: if you see the following dialogue box click the Next button
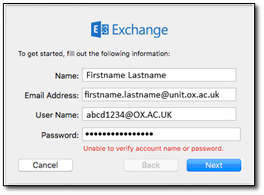
then enter the following details:
- email address: firstname.lastname@unit.ox.ac.uk (normal University email address)
- username: enter just your Single Sign On (SSO) in the format abcd1234 plus @OX.AC.UK (this address is case sensitive!)
- internal server address: https://outlook.office365.com (depending on which version of OS you're using, you may need to try the address with or without the https:// in front of it)
- external server address: leave blank.
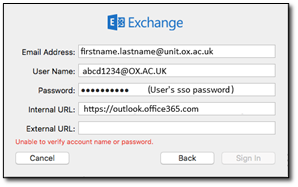
5. click on Sign In
6. choose which features you want to sync. For example, if you want to bring over your contacts and synch Apple Calendar with your exchange calendar, select those options from the list in addition to email.
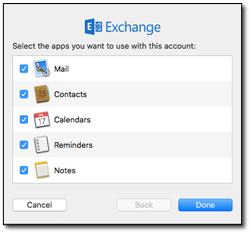
7. click Done to complete the set-up process.
To add your proper email address go to Mail/preferences/accounts/email address and drop down to edit email addresses, click on the plus sign (+) and add your proper sender address as firstname.lastname@unit.ox.ac.uk
Finally, when you compose a new email, the From address has a drop down menu where you can chose your proper address (eg larry.parker@ouit.ox.ac.uk)